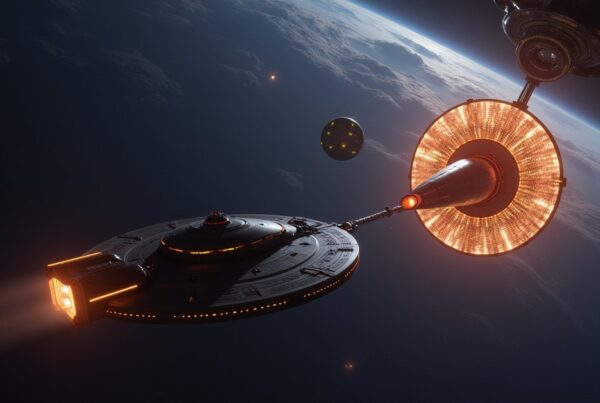
I Fix, Therefore I Am is a five-part Star Trek Fleet Command mission chain starring the Lower Decks crew. Mariner and Boimler set out to escort a Vulcan academic to a conference, stumble on a repair facility with ideas of its own, and need Captain Freeman to bail them out. Every part is recommended for level 50, the chain starts with a pickup on Vulcan, and Parts 1 to 4 each need warp 185. Rewards include nearly 700 million Parsteel, 49 million Dilithium, over 100 million Tritanium, 800 Ultra Recruit Tokens, 12,000 Latinum and a Brad Boimler shard. Plan for two large payments: 150M Tritanium and 1B Parsteel.
I Fix, Therefore I Am at a glance
| Part | Recommended level | Warp to complete | Key reward |
|---|---|---|---|
| I Fix, Therefore I Am Part 1 | 50 | 185 | 294,667,000 Parsteel, 10,000,000 Dilithium |
| I Fix, Therefore I Am Part 2 | 50 | 185 | 397,800,000 Parsteel, 72,900,000 Tritanium, 400 Ultra Recruit Token |
| I Fix, Therefore I Am Part 3 | 50 | 185 | 6,000,000 Dilithium, 5 1 Day Peace Shield |
| I Fix, Therefore I Am Part 4 | 50 | 185 | 30,375,000 Tritanium, 400 Ultra Recruit Token |
| I Fix, Therefore I Am Part 5 | 50 | 1 | 1 Brad Boimler shard, 12,000 Latinum, 33,000,000 Dilithium |
I Fix, Therefore I Am Part 1
Mariner and Boimler are tasked with escorting a Vulcan academic to a conference. After a briefing with Captain Freeman you collect the academic on Vulcan, head for Beine, clear 10 hostiles and then get away from some disgruntled agriculturalists in Baelos. Warp to complete is 185.
- Meet with Captain Freeman.
- Pick up the academic (Vulcan).
- Escort the academic to the conference (Beine).
- Defeat 10 hostiles of level 50 or higher.
- Escape the disgruntled agriculturalists (Baelos).
Rewards: 10,000,000 Dilithium, 10,000 5★ Common Refined Gas, 294,667,000 Parsteel.
I Fix, Therefore I Am Part 2
The pair come across a mysterious repair facility in Baelos. It wants a 150M Tritanium down payment before it will work on your ship, and after testing the repairs you end up fleeing to Draumen. Warp to complete is 185.
- Approach the repair facility (Baelos).
- Give the facility a down payment of 150M Tritanium.
- Test the repairs (Baelos).
- Flee the repair facility (Draumen).
Rewards: 400 Ultra Recruit Token, 72,900,000 Tritanium, 39 1 Day Speed Up, 397,800,000 Parsteel.
I Fix, Therefore I Am Part 3
Now Mariner and Boimler are being pursued. You still have to drop the academic at the conference in Draumen, then check a strange signal and keep running from the facility through Beine to Rylan. This part is all travel, with warp 185 to complete.
- Deliver the academic to the conference (Draumen).
- Investigate the strange signal (Draumen).
- Put some distance between you and the facility (Beine).
- Flee the facility (Rylan).
Rewards: 6,000,000 Dilithium, 5 1 Day Peace Shield.
I Fix, Therefore I Am Part 4
Mariner and Boimler head back to the Cerritos, but first they have to explain themselves in Rylan and fight off Roland. Warp to complete is 185.
- Explain the situation (Rylan).
- Defend yourself from Roland (Rylan).
- Return to the Cerritos.
Rewards: 400 Ultra Recruit Token, 8 3 Hour Repair Speed Up, 30,375,000 Tritanium.
I Fix, Therefore I Am Part 5
Captain Freeman saves the day. You face Roland once more, settle the facility’s bill of 1B Parsteel and talk it into a new purpose. No system is listed for these steps and warp to complete is 1.
- Stand your ground against Roland.
- Make good on the payment of 1B Parsteel.
- Convince the repair facility to rethink its purpose.
- Hang out at the warp core.
Rewards: 1 Brad Boimler shard, 12,000 Latinum, 33,000,000 Dilithium.
Tips for completing I Fix, Therefore I Am
The two payments shape the whole chain. Part 2 asks for 150M Tritanium up front, and the part itself only returns 72.9M, so have the full 150M ready before you approach the facility. Part 5 asks for 1B Parsteel. Parts 1 and 2 give you 692,467,000 Parsteel between them, which leaves roughly 308 million to cover from your own stock, so avoid spending the chain’s Parsteel on other upgrades until Part 5 is done.
Warp 185 applies to Parts 1 through 4, covering Vulcan, Beine, Baelos, Draumen and Rylan. Make sure your ship can reach that range before you start, or the chain stalls at the first pickup. Part 3 is pure travel across three systems, so a fast ship with good warp range clears it quickest. Part 5 is the only step at warp 1.
Combat is limited. Part 1 has 10 hostile kills of level 50 or higher, which can come from anywhere, and Roland is the opponent in Parts 4 and 5. No enemy strength is listed for Roland, so go into those parts with a fully repaired level 50 fleet. The 8 repair speed-ups from Part 4 arrive right before the second Roland encounter.
The chain belongs to the Lower Decks arc. The mission guide lists the other chains around level 50.
Are the I Fix, Therefore I Am rewards worth it?
Yes, if you can afford the entry costs. After the 150M Tritanium and 1B Parsteel payments, you still come out well ahead on Dilithium (49 million), Ultra Recruit Tokens (800), Latinum (12,000), 39 1 Day Speed Ups and five 1 Day Peace Shields. Parsteel and Tritanium both run at a loss overall, and the single Boimler shard is a small officer reward, so treat this chain as a Dilithium, recruit token and speed-up haul.