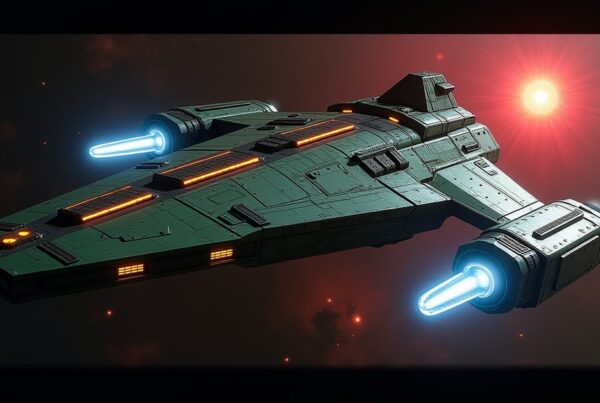
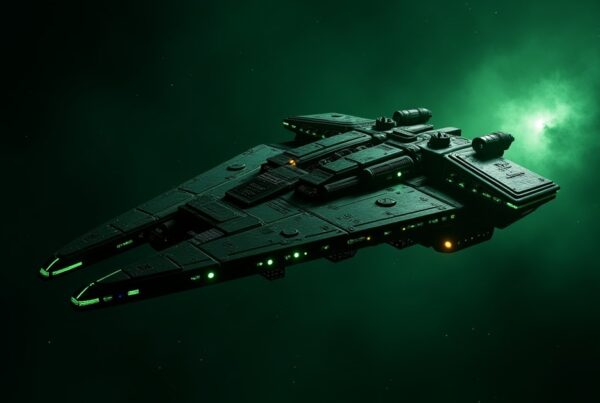
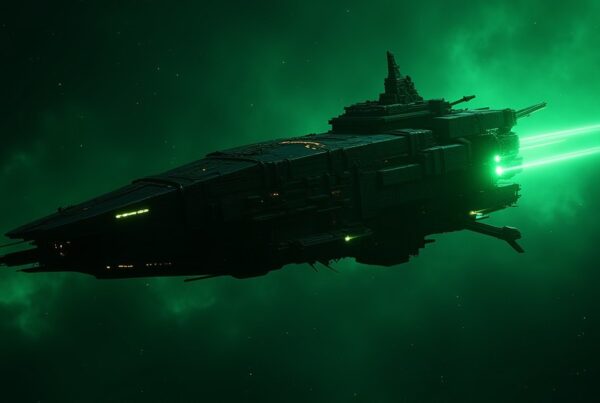
Borg armadas in Star Trek Fleet Command are group armadas against Borg Cubes, and they spawn at four levels: the level 25 Borg Cube in eleven systems at warp 25 (Alastor, Gakora, Soltor, Semele, Halkor, Truai, Castor, Altor, Antigone, Yaar and Protari), the level 30 Borg Tactical Cube in Udarian, Razgara, Olaria and Feilji at warp 29, the level 35 Borg Assimilator Cube in Waji’ku and Xent’kra at warp 33, and the three level 40 Mega Cubes in Megaera, Tisiphone and Alecto at warp 33. All of them drop Active Nanoprobes. The later Borg Polygon group armadas (level 42 to 70) and the Conqueror Borg solo armadas (level 55 to 80) have their own tables below. Looking for the Borg Spheres? Those are on the Borg solo armada locations page.
Borg armada locations
Every Borg Cube armada sits in systems whose level matches the armada, so the level column doubles as the system level. The Nanoprobe payout rises sharply with each tier, from 120 on the Borg Cube to 7,000 on a Mega Cube.
| Target | Level | Rarity | Warp | Systems (level) | Active Nanoprobes |
|---|---|---|---|---|---|
| Borg Cube | 25 | Uncommon | 25 | Alastor (25), Gakora (25), Soltor (25), Semele (25), Halkor (25), Truai (25), Castor (25), Altor (25), Antigone (25), Yaar (25), Protari (25) | 120 |
| Borg Tactical Cube | 30 | Rare | 29 | Udarian (30), Razgara (30), Olaria (30), Feilji (30) | 1,280 |
| Borg Assimilator Cube | 35 | Epic | 33 | Waji’ku (35), Xent’kra (35) | 4,500 |
| Mega Cube Disruptor | 40 | Epic | 33 | Megaera (40), Tisiphone (40), Alecto (40) | 7,000 |
| Mega Cube Photon Cannon | 40 | Epic | 33 | Megaera (40), Tisiphone (40), Alecto (40) | 7,000 |
| Mega Cube Tractor Beam | 40 | Epic | 33 | Megaera (40), Tisiphone (40), Alecto (40) | 7,000 |
The three Mega Cubes (Disruptor, Photon Cannon and Tractor Beam) share the same three systems and identical stats, so treat them as one level 40 Epic target with three faces.
How to run Borg armadas
The level 25 to 35 cubes play like regular armadas: standard armada crews work, and they are best flown on the Vi’dar. These armadas pay modest rewards on their own, which is why most alliances save them for Borg events, when kills also score event points.
The Epic Mega Cubes need a different approach. Without several strong Vi’dars in your alliance, a first attempt will probably fail, but it is still worth trying, because the directives are free and even a failed attack earns points toward other events. As your alliance builds stronger Vi’dars, you can make real attempts. Crewing matters more here than in any other Borg armada, so coordinate before you launch:
- Depending on your strength, put Five of Eleven in the captain seat for mitigation and Six of Eleven for damage on every ship but one.
- One player should run a hull breach officer, ideally Lorca, with Gorkon as the fallback.
- The rest should use Khan to raise critical hit chance, which multiplies damage while the target is hull breached.
- The weakest Vi’dar should take Nine of Eleven as captain with Seven of Eleven and Eight of Eleven. Together they strip away critical hits, which cuts the damage the whole group takes.
Players with the highest-tier Khans should lead the armada. If Khans are equal, lead with the highest-tier Vi’dars, and let weaker players fill the support roles.
Crews for Borg armadas
The standard crew for the Borg Cube, Tactical Cube and Assimilator Cube is Five of Eleven as captain with Six of Eleven and Khan, with below decks weighted toward attack and health. Every Borg Cube armada carries a 30% critical chance, with crit damage from 270% on the Borg Cube up to 400% on the Mega Cubes, so anything in your crew that reduces critical hits pays off. Crew picks shift with the meta; the officer tier list keeps current recommendations.
Borg Polygon armada locations
Borg Polygons are Borg group armadas from level 42 to 70 in three versions (1.0, 1.1 and 1.2), and each pays Borg Polygon Group Armada Credits. Their Q Junior’s Twist ability sets a clock: defeat the Borg Polygon within 20 rounds. They also fire a Cutting Beam on the second weapon of every round that deals lethal damage, and Polygon 1.1 and 1.2 raise their Apex Barrier by 30,000 at the start of combat, with 1.2 adding a 400% increase to weapon shots.
| Level | Target | Warp | System | Polygon credits | Power |
|---|---|---|---|---|---|
| 42 | Borg Polygon 1.0 | 105 | Nova Kron | 800 | 1,353,148,628,952 |
| 44 | Borg Polygon 1.0 | 150 | Ephemeris | 1,000 | 3,968,726,557,548 |
| 44 | Borg Polygon 1.1 | 150 | Neco | 3,000 | 34,069,261,309,561 |
| 46 | Borg Polygon 1.0 | 170 | Brikker | 1,250 | 9,577,621,310,448 |
| 46 | Borg Polygon 1.1 | 170 | Horalius | 12,000 | 47,304,641,326,329 |
| 48 | Borg Polygon 1.0 | 190 | Gilmour | 1,565 | 16,502,284,784,265 |
| 48 | Borg Polygon 1.1 | 190 | Opanth | 14,000 | 64,356,610,348,586 |
| 50 | Borg Polygon 1.0 | 195 | Osbor | 2,000 | 29,510,583,715,349 |
| 50 | Borg Polygon 1.1 | 195 | Kenakel | 17,000 | 86,747,507,090,508 |
| 52 | Borg Polygon 1.1 | 240 | Mehruunahd | 20,000 | 152,988,119,998,495 |
| 54 | Borg Polygon 1.1 | 295 | Pherson | 24,000 | 225,386,035,065,884 |
| 54 | Borg Polygon 1.2 | 295 | Toralia | 68,000 | 382,175,353,788,480 |
| 56 | Borg Polygon 1.1 | 430 | Brookfield | 30,000 | 450,011,755,504,761 |
| 56 | Borg Polygon 1.2 | 430 | Puusha | 270,000 | 525,482,845,891,306 |
| 58 | Borg Polygon 1.1 | 480 | Faolain | 35,000 | 686,843,505,654,652 |
| 58 | Borg Polygon 1.2 | 480 | Brucam | 300,000 | 741,769,690,133,832 |
| 60 | Borg Polygon 1.1 | 700 | Corialsis | 45,000 | 1,114,034,979,769,421 |
| 60 | Borg Polygon 1.2 | 700 | Jamohr | 330,000 | 1,257,194,423,422,076 |
| 62 | Borg Polygon 1.2 | 1000 | Taryyn | 360,000 | 1,650,889,005,954,452 |
| 64 | Borg Polygon 1.2 | 1320 | Sotama | 400,000 | 2,588,511,149,540,036 |
| 66 | Borg Polygon 1.2 | 1375 | New Salem | 440,000 | 3,482,992,871,290,467 |
| 68 | Borg Polygon 1.2 | 1495 | Canavan | 480,000 | 4,779,946,512,165,674 |
| 70 | Borg Polygon 1.2 | 1585 | Gusoeop, Manmoor | 600,000 | 6,801,756,238,861,663 |
Each Polygon system also holds a Borg Type 03, the solo version of the same fight, which is covered on the Borg solo armadas page.
Conqueror Borg armada locations
The Conqueror Borg armadas are solo armadas for the endgame, from level 55 to 80, and they pay Conqueror Borg Spatial Particles.
| Level | Rarity | Warp | Systems | Spatial Particles |
|---|---|---|---|---|
| 55 | Common | 320 | Alma, M2-Parcer, Fee’Nan | 50 |
| 58 | Common | 440 | Chari, Natehal, Lor-925 | 100 |
| 60 | Common | 500 | K’Biuk, Ana’Wi | 250 |
| 62 | Uncommon | 1000 | Ki’Ha, Amba-99 | 500 |
| 64 | Uncommon | 1200 | Rua-V | 650 |
| 65 | Uncommon | 1250 | Del Fine | 1,000 |
| 67 | Uncommon | 1400 | Ste-Aid | 2,000 |
| 69 | Uncommon | 1550 | T-For | 4,000 |
| 72 | Rare | 1600 | Nic-B | 8,000 |
| 75 | Rare | 3500 | Aligar | 10,000 |
| 76 | Rare | 4000 | P’Vall-Ile | 16,000 |
| 78 | Rare | 5000 | R-Sha | 32,000 |
| 80 | Rare | 6000 | Molan’Lar | 64,000 |
Every Conqueror Borg solo armada carries Adapt, Overcome, which destroys all of your ships unless you bring one Explorer, one Interceptor and one Battleship and have built the Warp Dive Bar. They also raise their Isolytic Damage at the start of combat (by 50% on the Common tier, 1500% on Uncommon and 3000% on Rare), and the Uncommon and Rare tiers add Apex Barrier. For crew, the fight rewards Isolytic defense and critical damage reduction more than raw damage, so build around those and check the officer tier list for the current best picks.
Do not confuse these armadas with the Conqueror Borg Suppressors and Obliterators. Those are roaming hostiles from level 55 to 80 in the Assimilated systems, such as Assimilated Sol, and they destroy any ship that is not a Borg Sphere. The Conqueror Borg Suppressor page covers where they spawn and how the Sphere beats them.
Borg Cube armada stats
These are the stats for each Borg Cube armada. Hull and shield health are equal on every cube.
| Target | Power | Hull HP | Shield HP | Attack | Damage per round | Defense |
|---|---|---|---|---|---|---|
| Cube (25) | 38,879,151 | 38,576,151 | 38,576,151 | 206,390 | 128,390 | 96,610 |
| Tactical Cube (30) | 48,565,131 | 47,414,762 | 47,414,761 | 947,489 | 752,489 | 202,880 |
| Assimilator Cube (35) | 62,808,403 | 60,058,698 | 60,058,697 | 2,455,526 | 2,046,026 | 294,180 |
| Mega Disruptor (40) | 100,000,000 | 89,354,505 | 89,354,505 | 10,036,840 | 8,273,065 | 608,655 |
| Mega Photon Cannon (40) | 100,000,000 | 89,354,505 | 89,354,505 | 10,036,840 | 8,273,065 | 608,655 |
| Mega Tractor Beam (40) | 100,000,000 | 89,354,505 | 89,354,505 | 10,036,840 | 8,273,065 | 608,655 |
Defense and piercing
| Target | Armor | Shield deflection | Dodge | Armor piercing | Shield piercing | Accuracy | Crit chance / damage |
|---|---|---|---|---|---|---|---|
| Cube (25) | 14,492 | 2,415 | 2,415 | 4,875 | 29,250 | 4,875 | 30% / 270% |
| Tactical Cube (30) | 28,984 | 5,796 | 5,796 | 12,187.5 | 73,125 | 12,187.5 | 30% / 300% |
| Assimilator Cube (35) | 43,476 | 7,680 | 7,680 | 29,250 | 146,250 | 29,250 | 30% / 400% |
| Mega Disruptor (40) | 40,577 | 40,577 | 40,577 | 87,750 | 438,750 | 61,425 | 30% / 400% |
| Mega Photon Cannon (40) | 40,577 | 40,577 | 40,577 | 438,750 | 61,425 | 87,750 | 30% / 400% |
| Mega Tractor Beam (40) | 40,577 | 40,577 | 40,577 | 61,425 | 87,750 | 438,750 | 30% / 400% |
Borg Cube firing patterns
Every cube mixes light weapons that fire every round with heavier ones that fire every other round, so damage spikes on alternate rounds. The Mega Cubes fire four to six shots per weapon.
| Target | Weapon type | Count | Damage per shot | Fires | Crit |
|---|---|---|---|---|---|
| Cube (25) | Kinetic | 1 | 4,987–6,095 x2 shots | Every round | 30% (2.7x) |
| Kinetic | 1 | 27,933–34,140 x2 shots | Every other round | 30% (2.7x) | |
| Energy | 1 | 4,987–6,095 x2 shots | Every round | 30% (2.7x) | |
| Energy | 1 | 7,980–9,753 x4 shots | Every other round | 30% (2.7x) | |
| Tactical Cube (30) | Kinetic | 1 | 26,187–32,004 x2 shots | Every round | 30% (3x) |
| Kinetic | 1 | 146,653–146,653 x2 shots | Every other round | 30% (3x) | |
| Energy | 1 | 26,187–32,004 x2 shots | Every round | 30% (3x) | |
| Energy | 1 | 59,857–73,155 x4 shots | Every other round | 30% (3x) | |
| Assimilator Cube (35) | Kinetic | 1 | 45,489–55,593 x3 shots | Every round | 30% (4x) |
| Kinetic | 1 | 254,757–311,364 x3 shots | Every other round | 30% (4x) | |
| Energy | 1 | 45,489–55,593 x3 shots | Every round | 30% (4x) | |
| Energy | 1 | 72,784–88,956 x5 shots | Every other round | 30% (4x) | |
| Mega Disruptor (40) | Kinetic | 1 | 102,352–125,086 x4 shots | Every round | 30% (4x) |
| Kinetic | 1 | 382,137–467,046 x4 shots | Every other round | 30% (4x) | |
| Energy | 1 | 102,352–125,086 x4 shots | Every round | 30% (4x) | |
| Energy | 1 | 163,767–200,151 x6 shots | Every other round | 30% (4x) | |
| Kinetic | 1 | 163,767–200,151 x4 shots | Every round | 30% (4x) | |
| Energy | 1 | 163,767–200,151 x4 shots | Every round | 30% (4x) | |
| Mega Photon Cannon (40) | Kinetic | 1 | 102,352–125,086 x4 shots | Every round | 30% (4x) |
| Kinetic | 1 | 382,137–467,046 x4 shots | Every other round | 30% (4x) | |
| Energy | 1 | 102,352–125,086 x4 shots | Every round | 30% (4x) | |
| Energy | 1 | 163,767–200,151 x6 shots | Every other round | 30% (4x) | |
| Kinetic | 1 | 163,767–200,151 x4 shots | Every round | 30% (4x) | |
| Energy | 1 | 163,767–200,151 x4 shots | Every round | 30% (4x) | |
| Mega Tractor Beam (40) | Kinetic | 1 | 102,352–125,086 x4 shots | Every round | 30% (4x) |
| Kinetic | 1 | 382,137–467,046 x4 shots | Every other round | 30% (4x) | |
| Energy | 1 | 102,352–125,086 x4 shots | Every round | 30% (4x) | |
| Energy | 1 | 163,767–200,151 x6 shots | Every other round | 30% (4x) | |
| Kinetic | 1 | 163,767–200,151 x4 shots | Every round | 30% (4x) | |
| Energy | 1 | 163,767–200,151 x4 shots | Every round | 30% (4x) |
Weapon accuracy, penetration and modulation
Accuracy works against your dodge, penetration against your armor, and modulation against your shield deflection. A cool-down of 1 means the weapon fires every round, and 2 means every other round.
| Target | Weapon type | Count | Accuracy | Penetration | Modulation | Warm-up | Cool-down | Shots |
|---|---|---|---|---|---|---|---|---|
| Cube (25) | Kinetic | 1 | 4,875 | 4,875 | 29,250 | 1 | 1 | 2 |
| Kinetic | 1 | 4,875 | 4,875 | 29,250 | 2 | 2 | 2 | |
| Energy | 1 | 4,875 | 4,875 | 29,250 | 1 | 1 | 2 | |
| Energy | 1 | 4,875 | 4,875 | 29,250 | 2 | 2 | 4 | |
| Tactical Cube (30) | Kinetic | 1 | 19,500 | 19,500 | 117,000 | 1 | 1 | 2 |
| Kinetic | 1 | 9,750 | 9,750 | 58,500 | 2 | 2 | 2 | |
| Energy | 1 | 9,750 | 9,750 | 58,500 | 1 | 1 | 2 | |
| Energy | 1 | 9,750 | 9,750 | 58,500 | 2 | 2 | 4 | |
| Assimilator Cube (35) | Kinetic | 1 | 29,250 | 29,250 | 146,250 | 1 | 1 | 3 |
| Kinetic | 1 | 29,250 | 29,250 | 146,250 | 2 | 2 | 3 | |
| Energy | 1 | 29,250 | 29,250 | 146,250 | 1 | 1 | 3 | |
| Energy | 1 | 29,250 | 29,250 | 146,250 | 2 | 2 | 5 | |
| Mega Disruptor (40) | Kinetic | 2 | 61,425 | 87,750 | 438,750 | 1 | 1 | 4 |
| Kinetic | 1 | 61,425 | 87,750 | 438,750 | 2 | 2 | 4 | |
| Energy | 2 | 61,425 | 87,750 | 438,750 | 1 | 1 | 4 | |
| Energy | 1 | 61,425 | 87,750 | 438,750 | 2 | 2 | 6 | |
| Mega Photon Cannon (40) | Kinetic | 2 | 87,750 | 438,750 | 61,425 | 1 | 1 | 4 |
| Kinetic | 1 | 87,750 | 438,750 | 61,425 | 2 | 2 | 4 | |
| Energy | 2 | 87,750 | 438,750 | 61,425 | 1 | 1 | 4 | |
| Energy | 1 | 87,750 | 438,750 | 61,425 | 2 | 2 | 6 | |
| Mega Tractor Beam (40) | Kinetic | 2 | 438,750 | 61,425 | 87,750 | 1 | 1 | 4 |
| Kinetic | 1 | 438,750 | 61,425 | 87,750 | 2 | 2 | 4 | |
| Energy | 2 | 438,750 | 61,425 | 87,750 | 1 | 1 | 4 | |
| Energy | 1 | 438,750 | 61,425 | 87,750 | 2 | 2 | 6 |
Borg armada FAQ
Where are the Borg solo armada locations?
The Borg solo armadas are the Borg Spheres, in Megnomis, Atraxi, Petoran, Efros, Torovin, Thora-Beta-6, Thora-Omega-2 and Orin-Theta-12, plus the Borg Recon Sphere in Orin-Sigma-9. The cubes on this page are group armadas, not solo ones.
| System | Target | Levels | Warp |
|---|---|---|---|
| Megnomis, Atraxi | Borg Sphere | 35 | 35 |
| Petoran | Borg Sphere | 41 to 43 | 40 |
| Efros | Borg Sphere | 45 to 47 | 80 |
| Torovin | Borg Sphere | 48 to 50 | 80 |
| Thora-Beta-6 | Borg Sphere | 52 to 54 | 160 |
| Thora-Omega-2 | Borg Sphere | 56 to 58 | 205 |
| Orin-Theta-12 | Borg Sphere | 59 to 60 | 205 |
| Orin-Sigma-9 | Borg Recon Sphere | 60 | 430 |
Every Sphere pays Borg Solo Armada Credits of its own rarity (Uncommon, Rare or Epic) plus a Foreknowledge buff for the Vi’dar Talios. Per-tier stats and the location map are on the Borg solo armada locations page.
Where is the Borg Polygon armada?
Polygon 1.0 runs from level 42 in Nova Kron to level 50 in Osbor, Polygon 1.1 from level 44 in Neco to level 60 in Corialsis, and Polygon 1.2 from level 54 in Toralia to level 70 in Gusoeop and Manmoor. Warp runs from 105 up to 1,585.
What crew do I need for the Conqueror Borg solo armada?
There is no single required crew, but there is a required fleet: one Explorer, one Interceptor and one Battleship, plus the Warp Dive Bar, or Adapt, Overcome destroys every ship you send. After that, prioritize officers and research that cut Isolytic Damage and critical damage, since those are what each tier raises.
Video: Borg armadas
Are Borg armadas worth running?
During a Borg event, yes: the cubes are quick points and a steady stream of Active Nanoprobes, and the Mega Cubes are the stretch goal for an alliance with strong Vi’dars. Outside events, the payout is small for the effort. For solo progress, the Borg Spheres and the Vi’dar Talios loop pay better, and the Borg hostiles hub lists every other Borg target by level.